How to get the faster connection and faster speed with TrustZone VPN on Ubuntu? Use a new fastest next-generation VPN protocol - WireGuard!
It’s faster than OpenVPN or IPsec but also has a smaller codebase that is easier to audit and maintain. Ubuntu WireGuard manual differs from Windows WireGuard installation and Android WireGuard guides. In this manual, we will show you how to install TrustZone VPN connection with WireGuard protocol on Ubuntu.

Run Terminal emulator: Press Alt+F2 on the keyboard, type x-terminal-emulator and press Enter.
Install WireGuard with the following command.
sudo apt-get install wireguard resolvconf
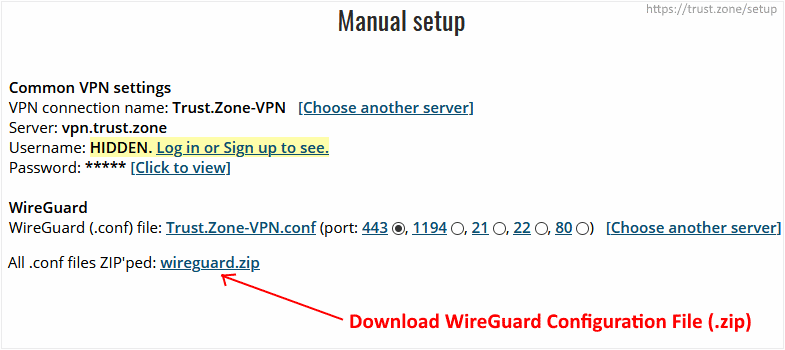
Go to setup page on TrustZone, find WireGuard under Manual Setup section. Download the wireguard.zip file to the ~/Downloads directory. See image below

Extract the downloaded wireguard.zip to the /etc/wireguard/ directory by running the following command:
sudo unzip ~/Downloads/wireguard.zip -d /etc/wireguard/
In order to see the list of the available connections please run the following command:
sudo ls /etc/wireguard
Connect to the desired VPN connection from the list with the following command:
sudo wg-quick up xx.tz
Please replace xx with a desired connection name (please do not include .conf)
For example:
sudo wg-quick up de.tz
In order to see the active connection please run the following command:
sudo wg show
To disconnect please run the following command:
sudo wg-quick down xx.tz
Please replace xx with an active connection name
Besides, here is alternative way to install WireGuard for Ubuntu.
The instructions shows how to add support of the WireGuard VPN client into the Ubuntu NetworkManager by installing the WireGuard client for NetworkManager.
If you need to install WireGuard VPN for other OS - follow our WireGuard setup instructions