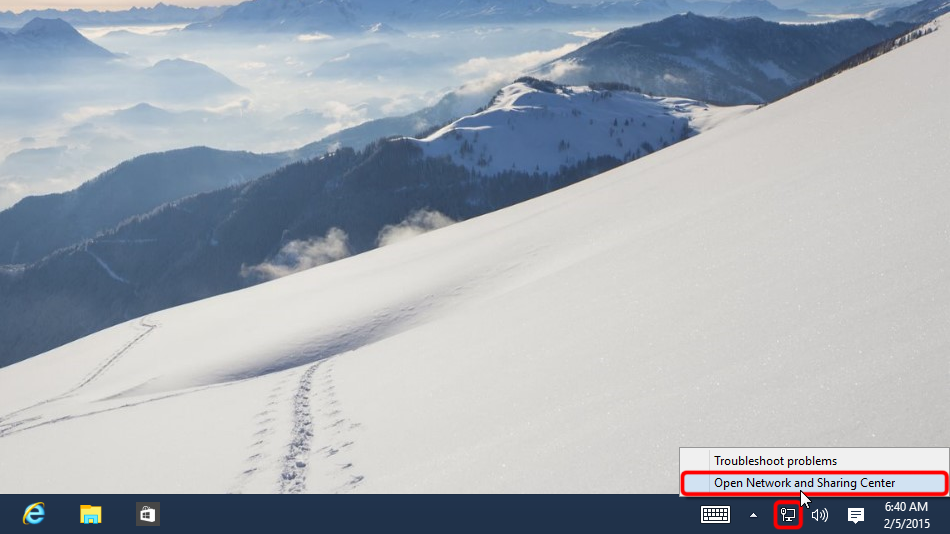
Sistem tepsisindeki ağ simgesine sağ tıklayın ve ardından "Ağ ve Paylaşım Merkezini Aç" seçeneğine tıklayın.
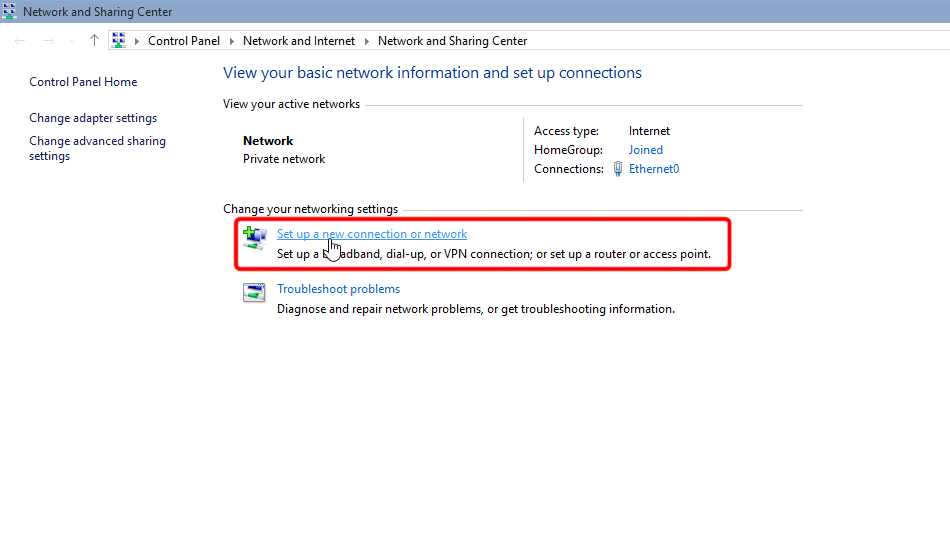
"Yeni bir bağlantı veya ağ kur" u tıklayın.
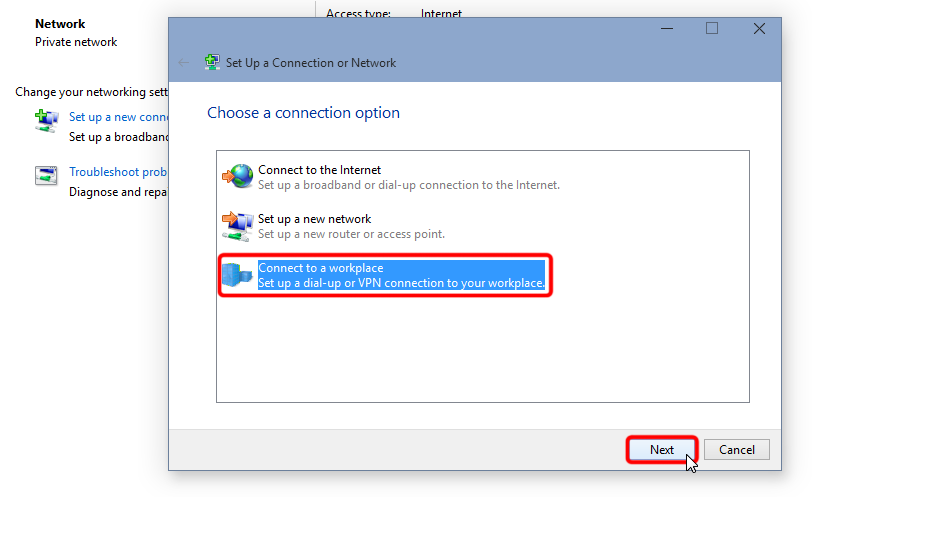
"Bir işyerine bağlan"ı seçin ve "İleri"ye tıklayın.
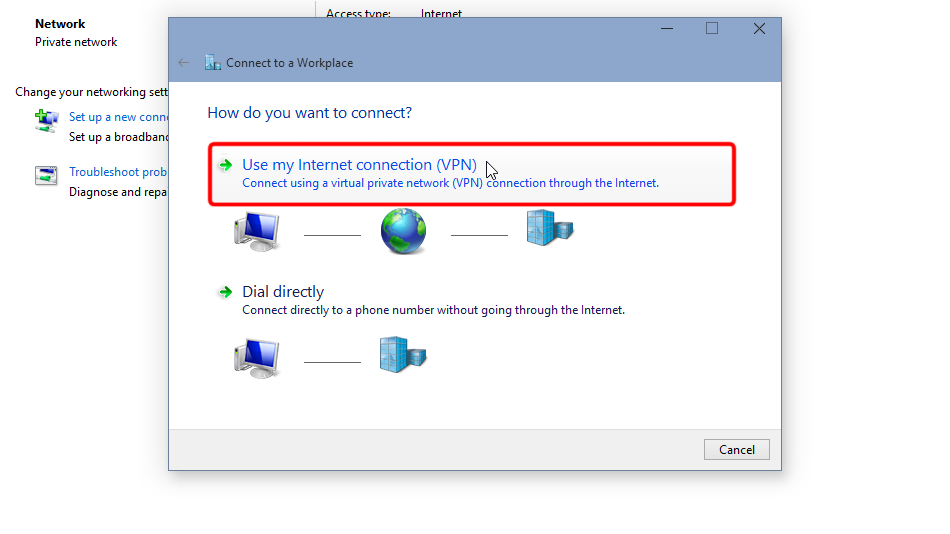
"İnternet bağlantımı kullan (VPN)" seçeneğine tıklayın.
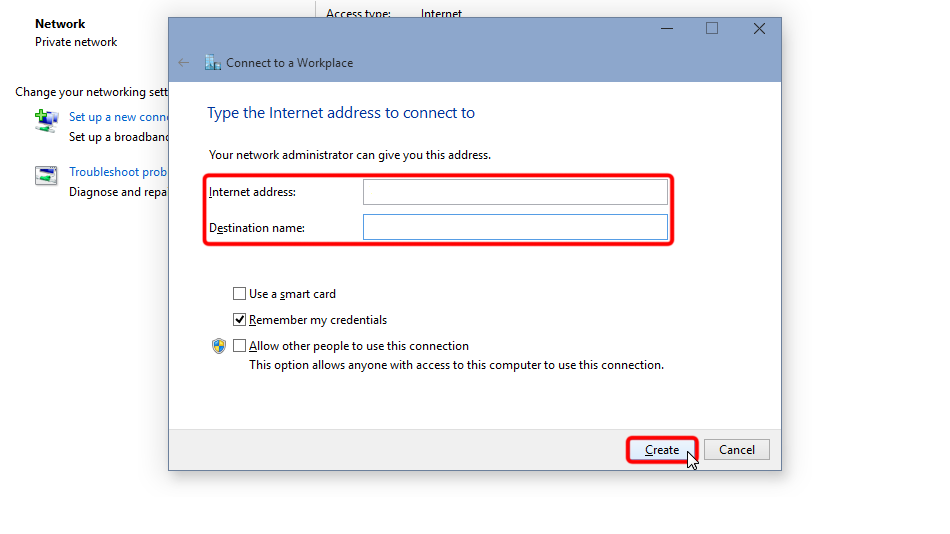
Formu aşağıda gösterilen değerlerle doldurun. "Kimlik bilgilerimi hatırla" seçeneğini işaretleyin ve "Oluştur" u tıklayın.
İnternet adresi: il-nfx.trust.zone
Hedef adı: Trust.Zone-Israel-Netflix
 il-nfx.trust.zone
Trust.Zone-Israel-Netflix
il-nfx.trust.zone
Trust.Zone-Israel-Netflix
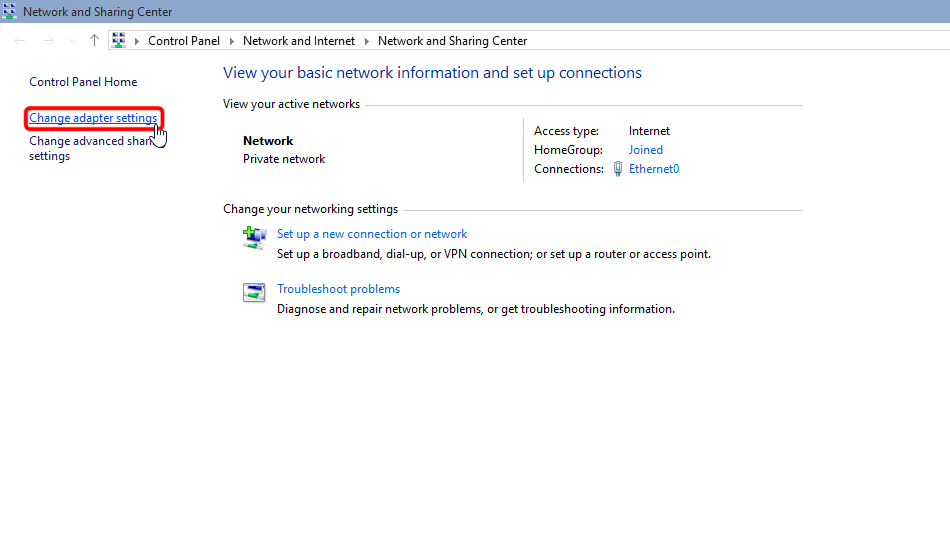
Ağ ve Paylaşım Merkezi'ni açın ve "Adaptör ayarlarını değiştir"e tıklayın.
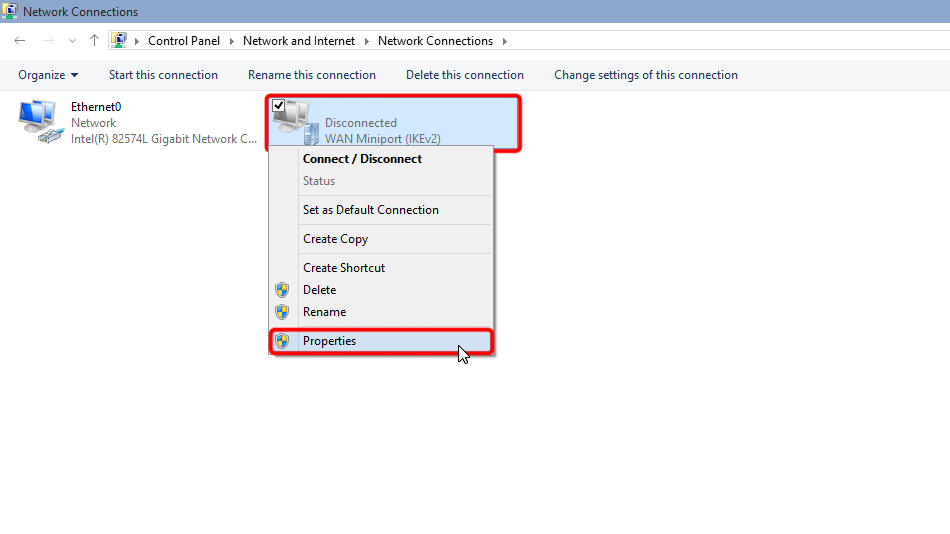
VPN ağ bağdaştırıcısına sağ tuşla tıklayın ve ardından "Özellikler" e tıklayın.
 Trust.Zone-Israel-Netflix
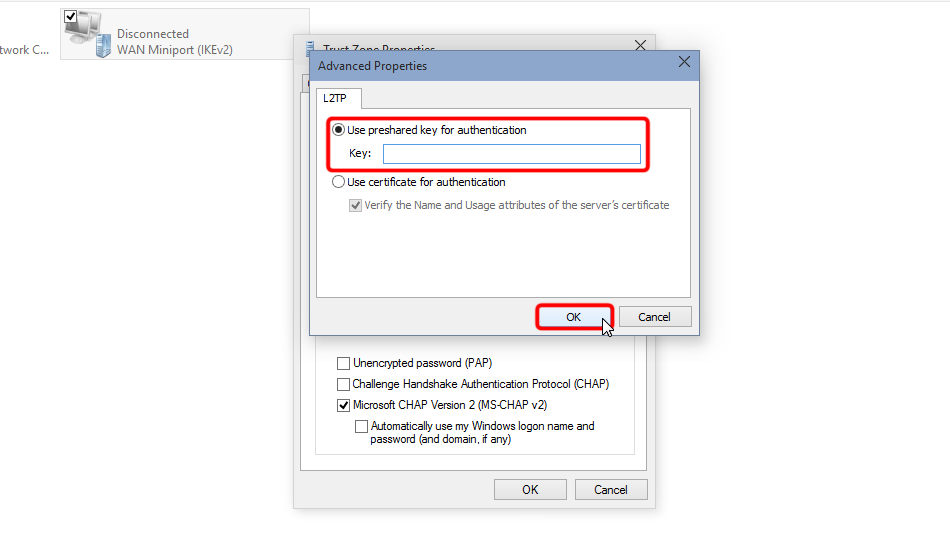
Sekmeye geçin "Güvenlik", seçin VPN Türü "IPsec ile Katman 2 Tünel Protokolü (L2TP/IPsec)" ve ekran görüntüsünden ayarları devralın. Ardından "Gelişmiş ayarlar" üzerine tıklayın.
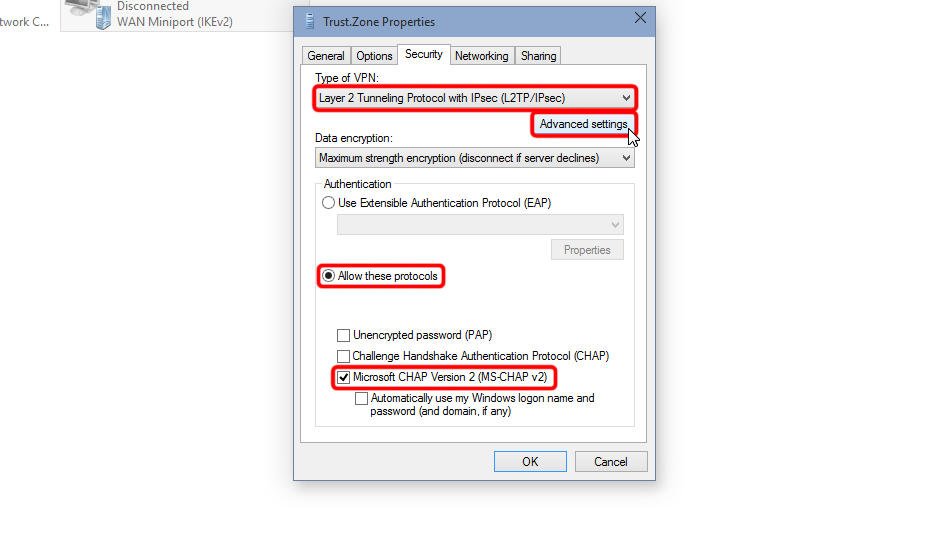
Set "Use preshared key for authentication", it is: trustzone
 Trust.Zone-Israel-Netflix
trustzone
Trust.Zone-Israel-Netflix
trustzone
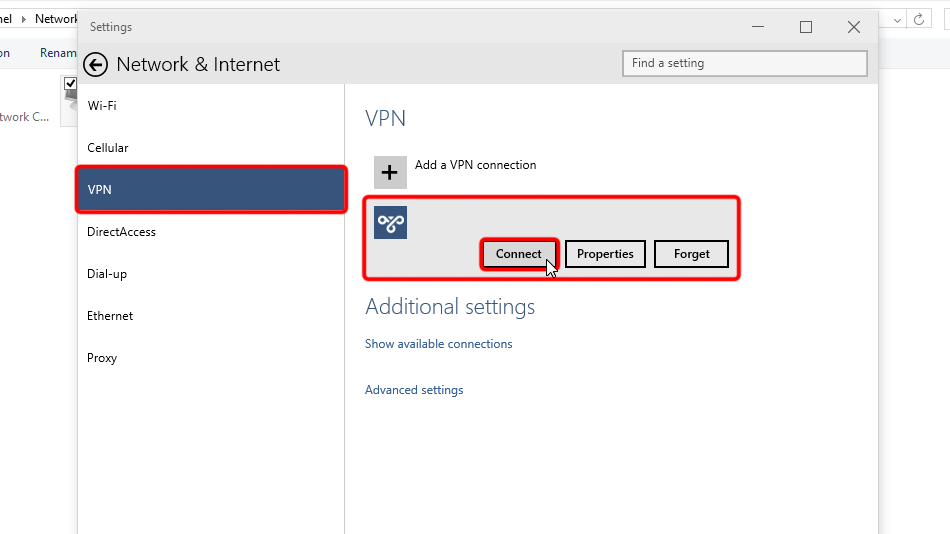
Görev çubuğundaki ağ simgesine tıklayın, VPN bağlantısını seçin ve "Bağlan" a tıklayın.
 Trust.Zone-Israel-Netflix
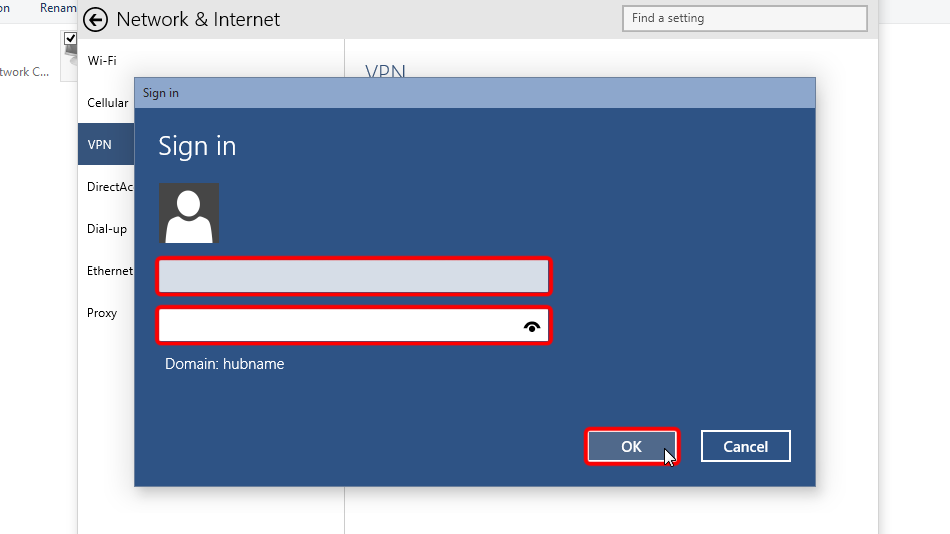
VPN oturum açma kimlik bilgilerinizi girin ve "Tamam"a tıklayın.
Username: GİZLİ. Giriş veya görmek için kaydolun.
Password: GİZLİ. Giriş veya görmek için kaydolun.
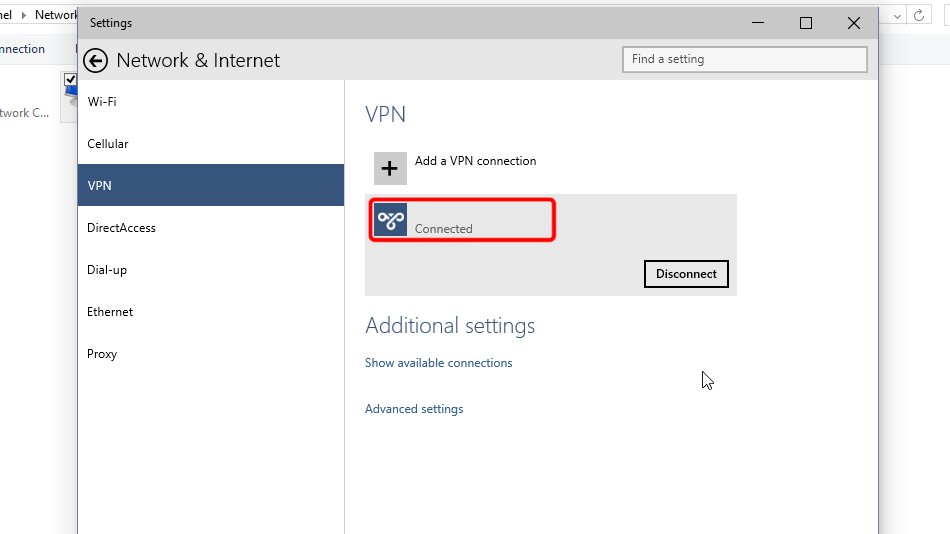
Bağlantı başarılı bir şekilde kurulduysa, "Bağlandı" mesajını görüntüler. VPN bağlantınızı ağ ayarlarından yönetebilirsiniz.
 Trust.Zone-Israel-Netflix
Trust.Zone Ana sayfasını oaçın ve Trust.Zone VPN ile bağlantınızın doğru kurulup kurulmadığını kontrol etmek için zaten açıksa yeniden yükleyin.
Ayrıca Bağlantı Kontrol Sayfamızı da ziyaret edebilirsiniz.
 IP adresiniz: x.x.x.x ·
  İsrail ·
Şimdi TRUST.ZONE! Gerçek konumunuz gizli!
İsrail ·
Şimdi TRUST.ZONE! Gerçek konumunuz gizli!
