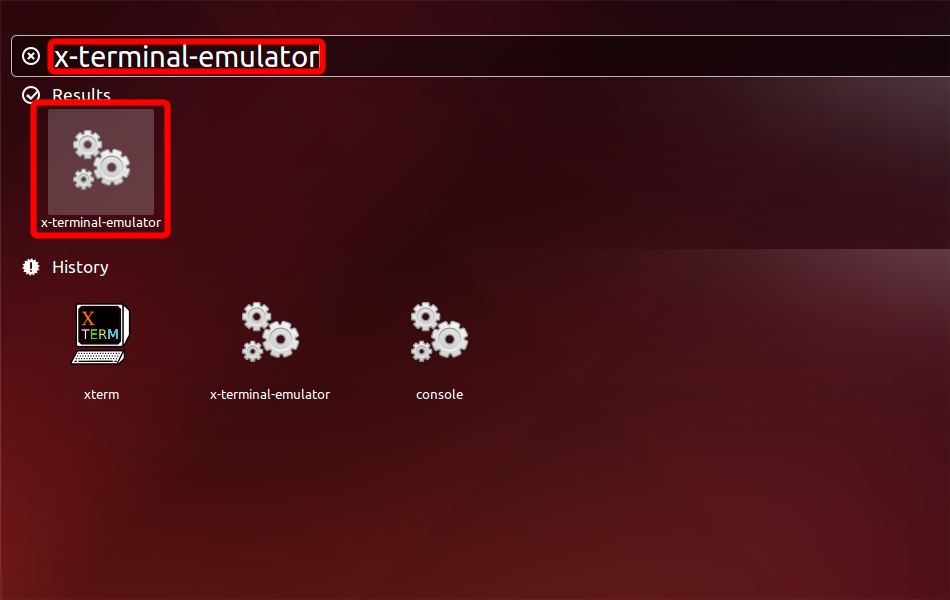
Ejecutar emulador de terminal: presione Alt+F2 en el teclado, escriba x-terminal-emulator y presione Entrar.
Instala OpenVPN con el siguiente comando.
sudo apt-get install network-manager-openvpn openvpn
For Ubuntu 16.04 install also network-manager-openvpn-gnome
sudo apt-get install network-manager-openvpn-gnome

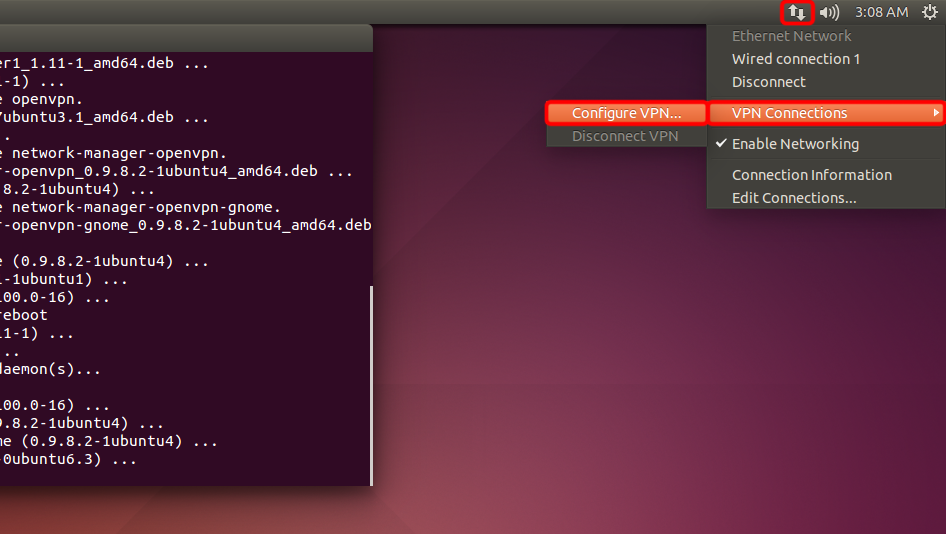
Abra el menú de red, vaya a "Conexiones VPN" y haga clic en "Configurar VPN...".
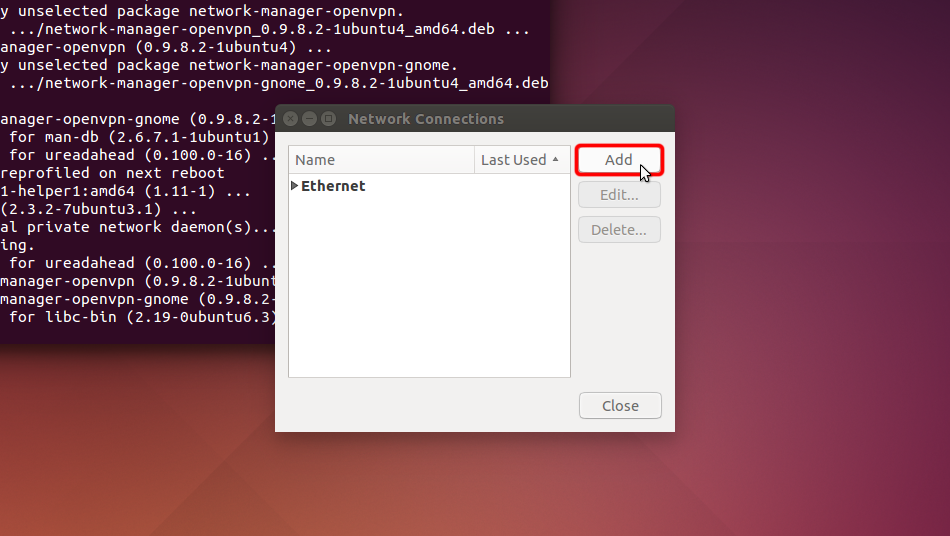
Haga clic en "Agregar".
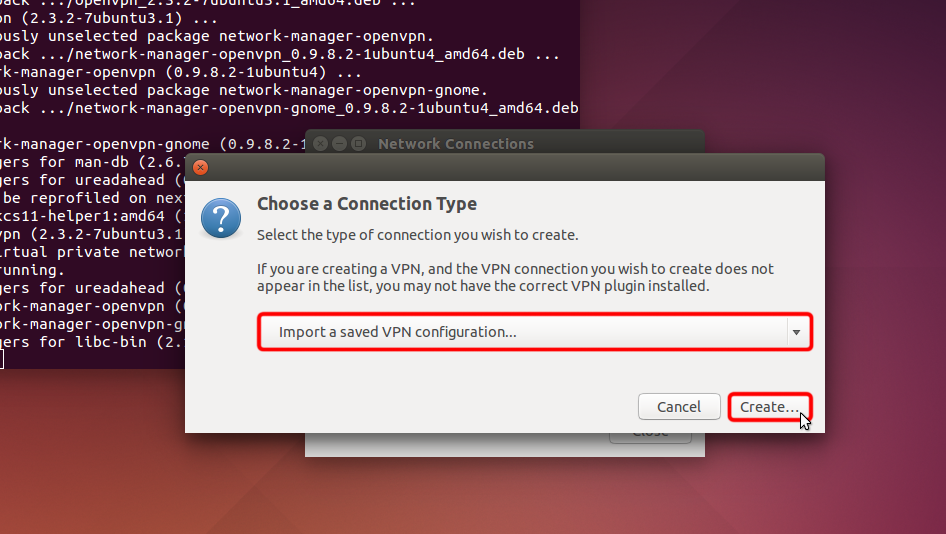
Haga clic en "Importar una configuración de VPN guardada..." y haga clic en "Crear"
Descargue el archivo de configuración de OpenVPN (archivo .ovpn), seleccione la sección "Descargas" y abra el archivo Trust.Zone-United-States-New-York.ovpn haciendo doble clic en él.
Archivo OpenVPN (.ovpn): OCULTO. Entre o Regístrese para ver.
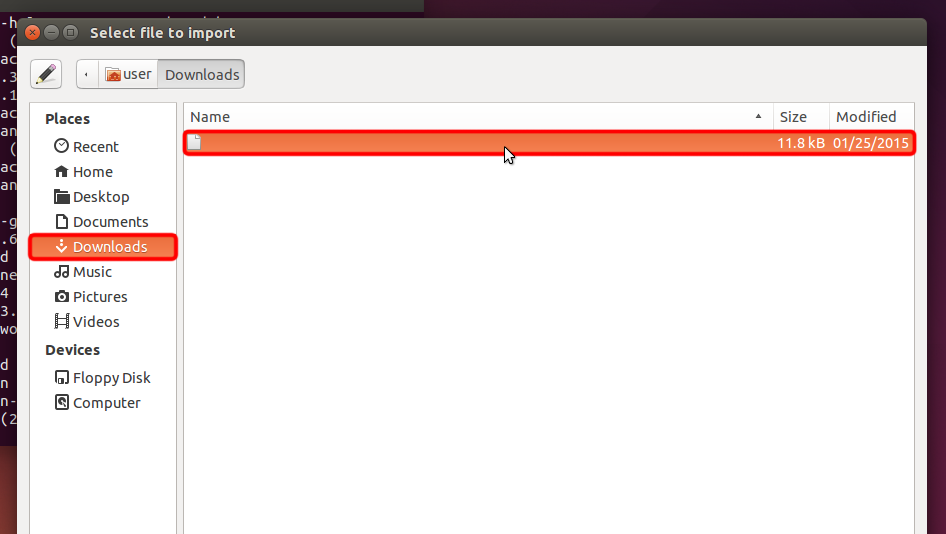 Trust.Zone-United-States-New-York.ovpn
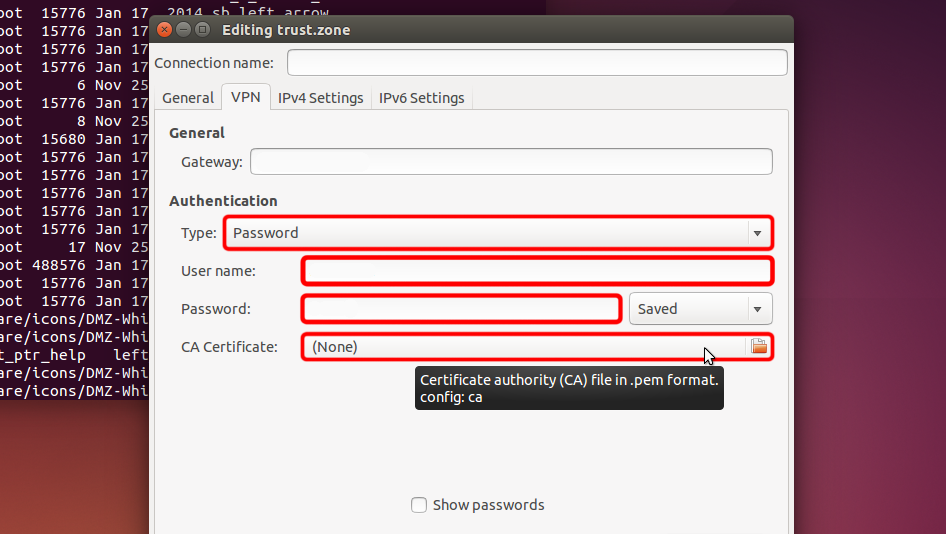
Seleccione "Contraseña" en el menú desplegable "Tipo", ingrese su nombre de usuario y contraseña de VPN.
Your VPN Username: OCULTO. Entre o Regístrese para ver.
Your VPN Password: OCULTO. Entre o Regístrese para ver.
Descargue el archivo de certificado y haga clic en el selector de archivos "CA Certificate" para elegir el archivo de certificado.
Certificate file: OCULTO. Entre o Regístrese para ver.
 Trust.Zone-United-States-New-York
us-ny.trust.zone
Trust.Zone-United-States-New-York
us-ny.trust.zone
Vaya a "Descargas" y haga doble clic en el nombre del certificado para elegirlo.
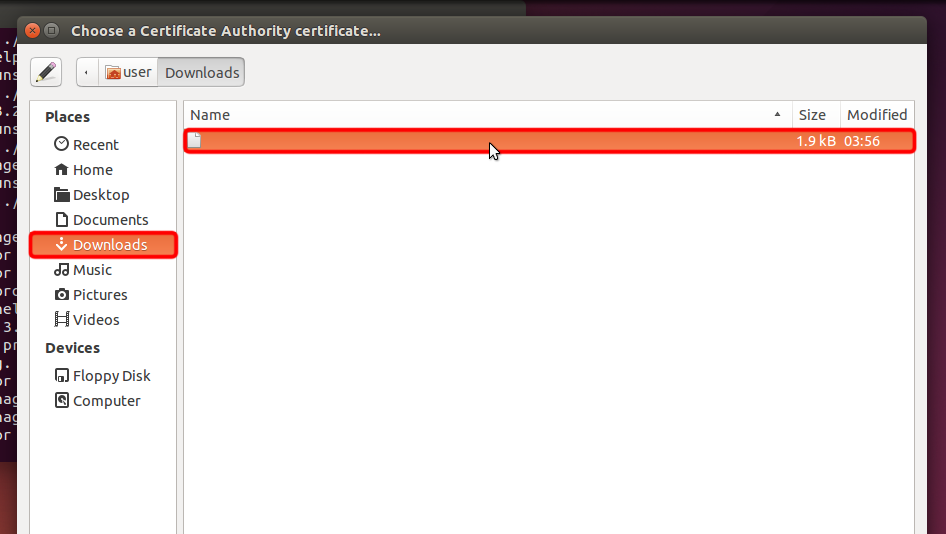 Trust.Zone-United-States-New-York.pem
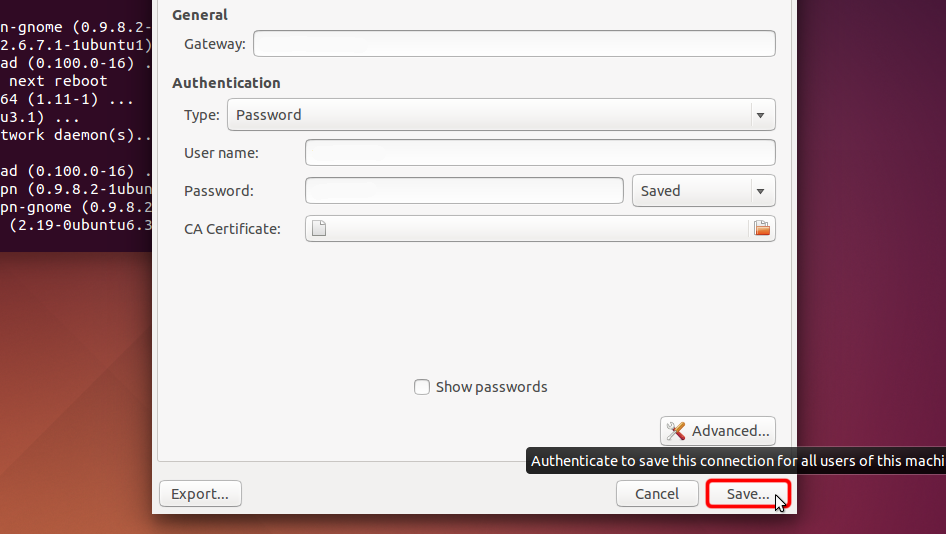
Haga clic en "Guardar..." para guardar la configuración de la conexión VPN.
 us-ny.trust.zone
Trust.Zone-United-States-New-York.pem
us-ny.trust.zone
Trust.Zone-United-States-New-York.pem
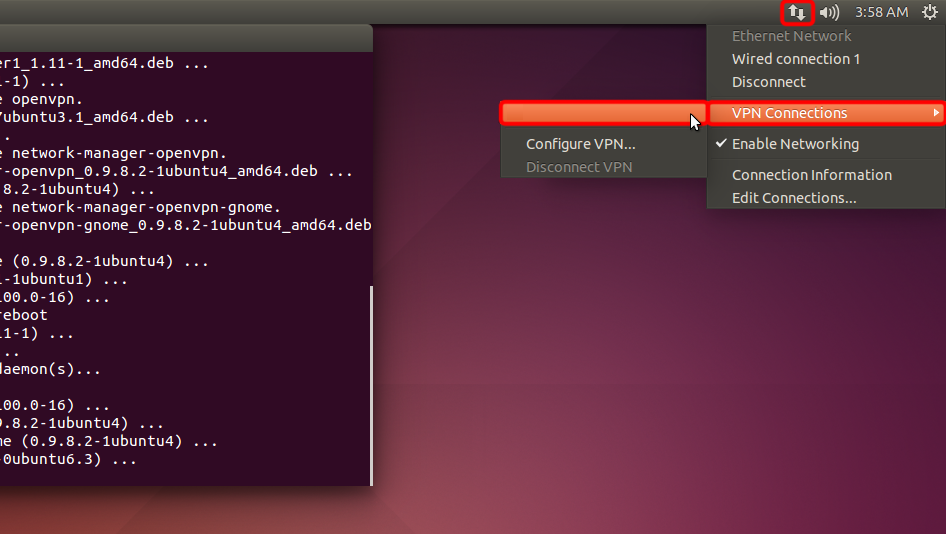
Haga clic en el icono del menú de red, elija "Conexiones VPN" y haga clic en el nombre de la conexión creada para establecer una conexión VPN.
 Trust.Zone-United-States-New-York
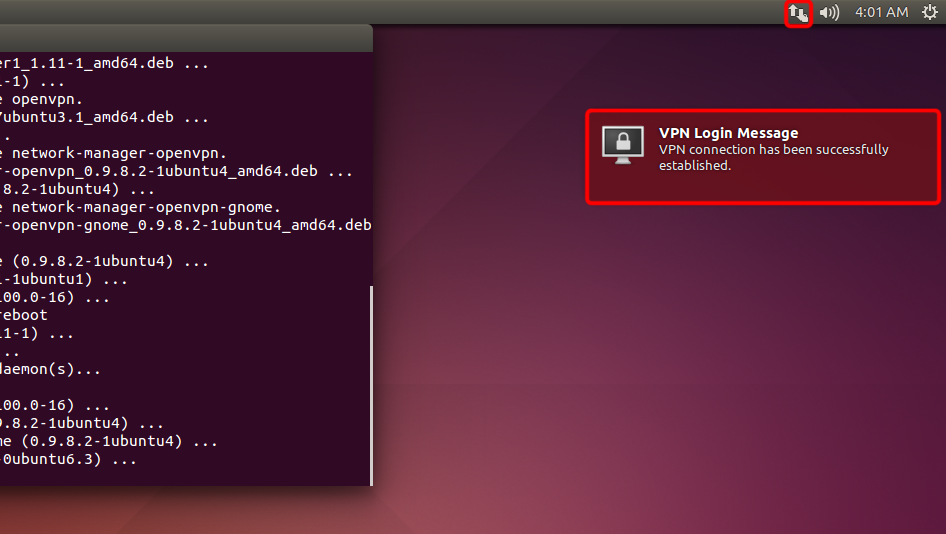
Si la conexión se ha establecido correctamente, el estado se muestra en la barra de menú y en el mensaje de globo.
Para administrar sus conexiones VPN, haga clic en el icono "Conexiones de red", elija "Conexiones VPN" = > "Configurar VPN...".
Después de conectarse a la VPN de Trust.Zone, su dirección IP IPv4 cambiará, pero su dirección IPv6 seguirá siendo la misma.
Esto no es un problema en caso de que su ISP NO admita IPv6, pero en caso de que lo haga, su dirección IPv6 puede filtrarse.
La mejor manera de evitar que IPv6 se filtre, recomendamos deshabilitar IPv6 en su distribución de Linux. A continuación te explicamos cómo puedes hacerlo.
Para verificar si IPv6 ya está deshabilitado, ejecute el siguiente comando:
cat /proc/sys/net/ipv6/conf/all/disable_ipv6
Si el comando devuelve 1, entonces IPv6 ya está deshabilitado y puede omitir los pasos a continuación. En caso de que el valor devuelto sea 0, siga las instrucciones a continuación:
Por favor, abra el archivo /etc/sysctl.conf en su editor de texto favorito. En nuestro ejemplo usaremos nano editor.
sudo nano /etc/sysctl.conf
Agregue las siguientes líneas al final del archivo:
net.ipv6.conf.all.disable_ipv6 = 1
net.ipv6.conf.default.disable_ipv6 = 1
net.ipv6.conf.lo.disable_ipv6 = 1
Ahora puedes guardar el archivo y salir del editor. En caso de que use nano, debe presionar Ctrl-O para escribir los cambios y presionar Enter para confirmar la escritura del archivo. A continuación, puede pulsar Ctrl-X para salir del editor.
Ejecute el siguiente comando para actualizar los parámetros del kernel:
sudo sysctl -p
El comando devolverá las líneas que haya agregado a /etc/sysctl.conf
Ahora, cuando ejecute cat /proc/sys/net/ipv6/conf/all/disable_ipv6 el comando debería devolver 1. Esto significa que IPv6 está deshabilitado, por lo que la fuga de IPv6 ya no es posible.
Abra la página oprincipal de Trust.Zone y vuelva a cargarla si ya está abierta para comprobar si su conexión con Trust.Zone VPN está establecida correctamente.
También puede visitar nuestra página de verificación Connection.
 Tu IP: x.x.x.x ·
  Estados Unidos ·
¡Estás en TRUST.ZONE ahora! ¡Tu verdadera localización está oculta!
Estados Unidos ·
¡Estás en TRUST.ZONE ahora! ¡Tu verdadera localización está oculta!