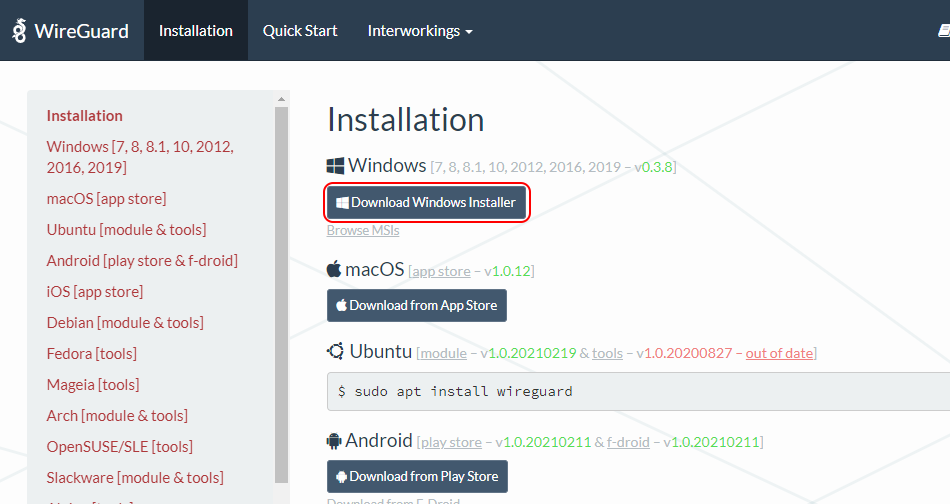
Download and install the official WireGuard client for Windows from the following page:https://www.wireguard.com/install/
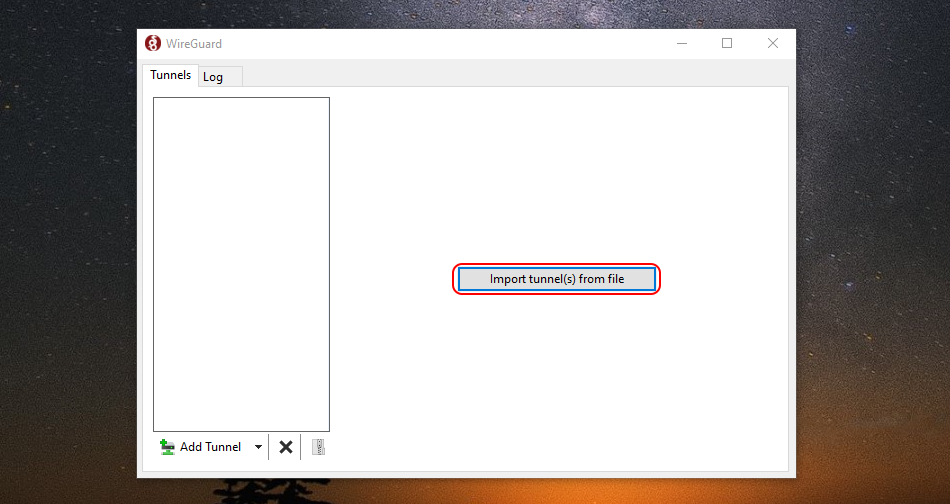
After installation WireGuard client should open. Please do not close it yet.
Make sure about you're logged into your Trust.Zone account with an active subscription in it by opening the Subscriptions Page.
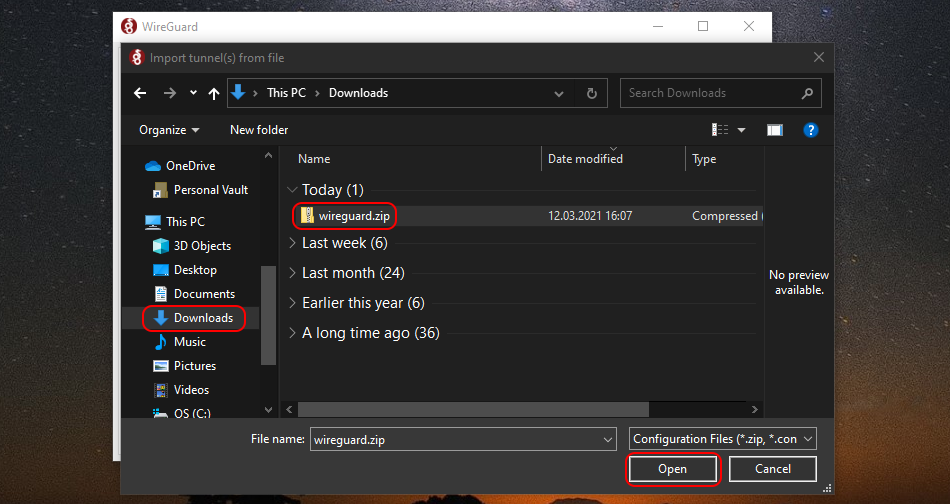
Download wireguard.zip ZIP-archive containing all WireGuard configurations available for your Trust.Zone account:
All WireGuard tunnel files ZIP'ped: HIDDEN. Log in or Sign up to see.
Please do not share the wireguard.zip file with anyone, as it contains your personal VPN credentials.
Switch to the WireGuard client app and click Import tunnel(s) from file button (or press Ctrl-O on your keyboard in case you don't see such button) to open import dialogue.
Navigate to downloaded wireguard.zip file and double click it to import VPN configurations.
Select desired connection from the imported connections list and double click it to connect.
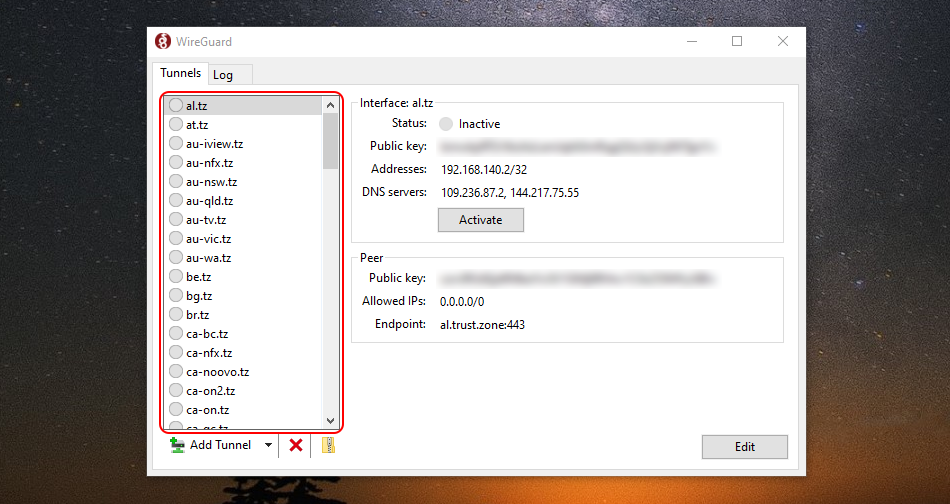
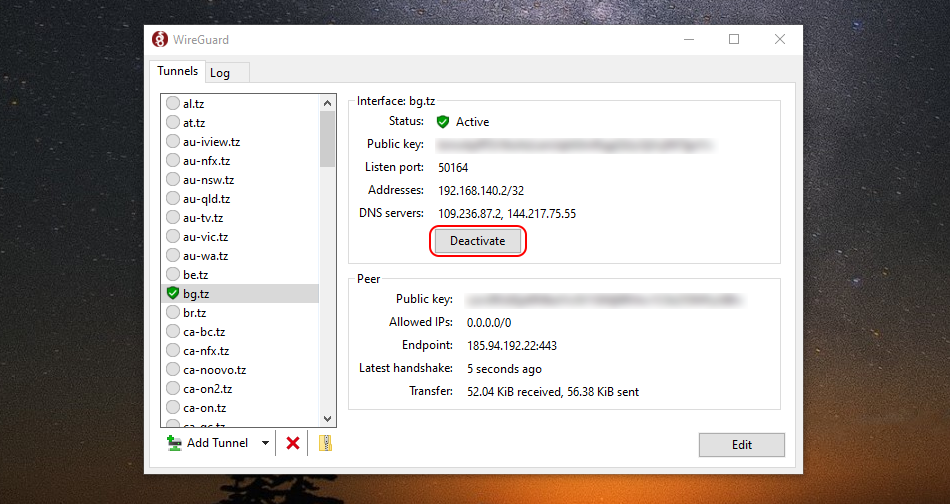
To disconnect please click the Deactivate button.
Open Trust.Zone Main page or reload it if it is already open in order to check if your connection with Trust.Zone VPN is established correctly.
You can also visit our Connection Check Page.
 Your IP: x.x.x.x ·
  Norway ·
You are in TRUST.ZONE now! Your real location is hidden!
Norway ·
You are in TRUST.ZONE now! Your real location is hidden!
